What are Diecast Cars?
Diecast cars are miniature vehicles made using a die-casting process, which involves injecting molten metal into molds. These models are popular among collectors and hobbyists due to their detailed designs and realistic appearance. They range in scale, with 1:18, 1:24, and 1:43 being common sizes. The allure of diecast cars lies not only in their collectibility but also in the potential for customization and personalization. Painting diecast cars is a rewarding hobby that allows you to transform a standard model into a unique piece, reflecting your creativity and attention to detail. This guide will provide you with the essential steps and techniques to get started on your diecast car painting journey.
Understanding the Basics
Before diving into the painting process, it’s crucial to grasp the fundamentals. This involves understanding the materials used in diecast car construction, such as zinc alloy, the types of paints that work best, and the tools you’ll need. The key to a successful paint job is preparation. Proper preparation includes cleaning, sanding, and priming the car’s surface. This ensures that the paint adheres properly and provides a smooth, even finish. Furthermore, you should be familiar with basic painting techniques, such as applying base coats, detailing, and clear coats. Understanding these basics will set you up for success and help you avoid common pitfalls in the painting process.
Materials You’ll Need

Gathering the right materials is essential for painting diecast cars. You’ll need a selection of paints, primers, and clear coats specifically designed for model or automotive use. Acrylic lacquers and enamels are popular choices due to their durability and ease of use. Additionally, you’ll need various grades of sandpaper, from coarse to fine, to prepare the surface properly. Other essential materials include a good quality primer to ensure paint adhesion and a clear coat to protect your work. Thinners or paint reducers, depending on the paint type, are crucial for achieving the right consistency and flow. Remember to always work in a well-ventilated area, and wear appropriate safety gear like a respirator and gloves to protect yourself from harmful fumes and chemicals. Consider investing in a dedicated painting booth for optimal results.
Choosing Your Paints
Selecting the right paints is crucial for achieving the desired finish on your diecast car. Acrylic lacquers and enamels are two popular choices due to their durability and ease of application. Acrylic lacquers dry quickly and offer excellent color depth, while enamels provide a durable, glossy finish but require a longer drying time. Consider the level of detail you want to achieve. For intricate designs and fine details, you may want to invest in specialized model paints designed for airbrushing. When choosing colors, consider the overall design of the car and the desired effect. Consider using a variety of colors for different parts of the car, such as the body, interior, and trim. Always test your paints on a small, inconspicuous area before applying them to the entire model to ensure compatibility and desired color matching.
Essential Tools for the Job
The right tools can make the painting process significantly easier and more enjoyable. An airbrush is highly recommended for achieving a smooth and even finish. A good airbrush allows for precise control over the paint flow and coverage. If you don’t have an airbrush, high-quality hobby brushes can also work, although they require more skill to apply paint evenly. Fine-grit sandpaper and sanding sticks are crucial for preparing the surface. You will also need masking tape and liquid mask for protecting areas that you don’t want to paint. A cutting mat and hobby knife are helpful for precision work, especially when applying decals or detailing. A dedicated painting stand or holder to securely hold the diecast car during painting is beneficial to avoid accidental contact. A magnifying lamp can be useful to see small details during the painting process.
Preparing the Diecast Car

Preparation is the most critical step for a successful paint job. This involves several stages, from disassembly to surface cleaning. Before you start, carefully disassemble the diecast car. Remove any parts that you don’t want to paint, such as windows, wheels, and interior components. This will make painting easier and prevent unwanted paint on these parts. Next, thoroughly clean the entire car to remove any dirt, grease, or residue. Use warm water, mild soap, and a soft brush. Once it’s clean, let it dry completely. The next step involves sanding the surface to remove any imperfections and create a smooth surface for paint adhesion. Use different grits of sandpaper, starting with a coarser grit to remove any imperfections, and then finishing with a finer grit for a smooth surface. This prepares the surface for priming.
Disassembly and Cleaning
Carefully disassemble the diecast car to make painting easier. This process allows you to access all surfaces without obstruction. It’s crucial to keep track of all the parts and their order. Take pictures or videos during disassembly to help with reassembly later. Once the car is disassembled, clean each part to remove any dirt, oil, or residue that could interfere with paint adhesion. Use warm water, mild soap, and a soft brush. Avoid harsh chemicals that could damage the plastic or metal. Rinse thoroughly and let the parts dry completely before moving to the next step.
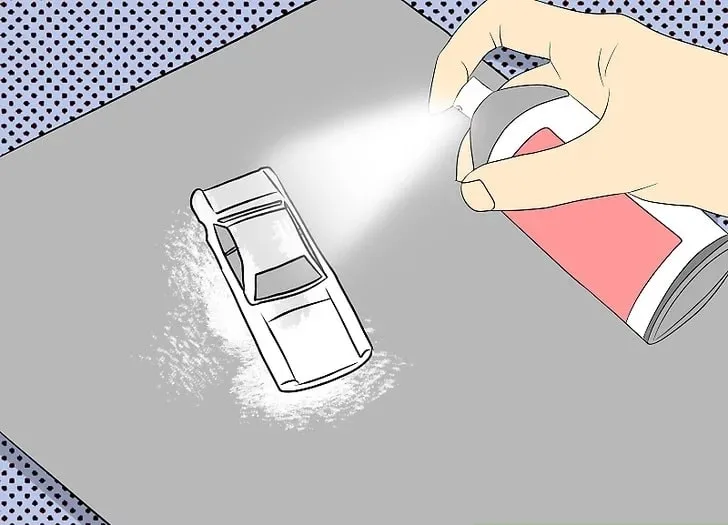
Sanding and Priming
Sanding is essential to prepare the surface for painting. Start with a medium-grit sandpaper to remove any imperfections. Progress to finer grits to achieve a smooth finish. Be careful not to remove too much material. After sanding, clean the surface again to remove any sanding dust. Apply a thin, even coat of primer. Primer helps the paint adhere to the surface, improves the color, and provides a uniform base. Apply multiple thin coats of primer, allowing each coat to dry before applying the next. Once the primer is dry, lightly sand it with a very fine grit sandpaper to remove any imperfections before painting.
The Painting Process

Once the diecast car is prepped, you can move on to the painting process. This involves applying base coats, adding details and decals, and protecting your work with a clear coat. Take your time and work in a well-ventilated area. The result will be a beautiful, custom-painted diecast car that will stand out in your collection. Consider the order of operations and plan the color schemes to ensure a great end result.
Applying the Base Coat
Start by applying the base coat of paint. Use an airbrush or hobby brush, depending on your preference and skill level. Apply thin, even coats, allowing each coat to dry before applying the next. Several thin coats are better than one thick coat to prevent drips or runs. For metallic paints, apply the paint evenly to avoid blotches. Let the base coat dry completely before moving on to the next step. This usually takes anywhere from a few hours to a day, depending on the paint type and environmental conditions.
Adding Details and Decals
Once the base coat is dry, you can start adding details and decals. Use fine-tipped brushes for detailing and apply decals carefully. For decals, use decal setting solutions to ensure they adhere properly. For detailing, consider using panel lining techniques to add depth and realism. Mask off areas to prevent unintended paint on detailed sections. Allow the details and decals to dry completely before moving on to the next step. This step allows you to add a personal touch and customize your car to your liking.
Protecting Your Work

Protecting your work is essential to ensure the paint job lasts. This usually involves applying a clear coat. The clear coat adds a protective layer against scratches, UV damage, and other environmental factors. Several types of clear coats are available, including acrylic, enamel, and lacquer-based options. Choose a clear coat that is compatible with your base coat and provides the desired finish (glossy, satin, or matte). Apply thin, even coats of clear coat, allowing each coat to dry before applying the next. This creates a durable, protective layer that enhances the overall appearance of your diecast car.
Clear Coating and Polishing
Apply the clear coat in several thin, even layers. This prevents drips and runs. Allow each layer to dry completely before applying the next one. After the clear coat is fully dry, you may need to polish the surface to remove any imperfections or orange peel effect. Start with a polishing compound and a soft cloth, then move to finer compounds for a smooth, glossy finish. Polishing enhances the shine of the clear coat and makes your diecast car look even more stunning.
Reassembly and Finishing Touches
Once the paint is completely dry and protected, you can reassemble the diecast car. This involves carefully putting all the parts back together. Refer to the photos or videos you took during disassembly to ensure everything goes back in the correct order. Once the car is reassembled, inspect it closely for any imperfections or areas that need touch-ups. Minor touch-ups can be done with a fine brush and matching paint. Final touches might include adding details like window trim, mirrors, and other small components. With these final touches, your custom-painted diecast car is now complete.
Common Mistakes to Avoid

Avoid common mistakes to ensure a successful paint job. One of the most common is inadequate preparation. Skipping cleaning, sanding, and priming can lead to poor paint adhesion and a less-than-perfect finish. Another mistake is applying too much paint at once. This leads to drips, runs, and a textured finish. Always apply thin, even coats. Using incompatible paints or primers can also cause problems. Always check the compatibility of the paints and primers you’re using. Finally, a lack of patience. Rushing the process, not allowing the paint to dry properly, can lead to a flawed result. Take your time and enjoy the process.
Troubleshooting Painting Issues
Even with careful planning, you may encounter some issues. Runs and drips can be caused by applying too much paint or spraying too closely to the surface. Immediately address the issue by gently sanding the affected area and reapplying the paint in thinner coats. Orange peel can result from improper spraying technique or paint that is too thick. Adjust your spray technique and use paint thinner to get the correct consistency. Poor paint adhesion can be due to inadequate surface preparation. Clean and prime the surface. If the paint is bubbling, it might be due to trapped air or using incompatible paints. Sand the area and start again. Always troubleshoot problems and learn from them.
Where to Find More Information
There are many resources available to help you learn more about painting diecast cars. Books, online forums, and tutorials can provide valuable information and guidance. Online communities and forums are great places to ask questions, share your work, and learn from other enthusiasts. Local hobby shops often offer classes and workshops. Take advantage of these resources to expand your knowledge and improve your skills. Look for model car clubs in your area, as they often host events and provide a supportive community. These resources can help you take your hobby to the next level.
Online Resources and Communities
The internet offers a wealth of resources for painting diecast cars. Websites, YouTube channels, and online forums are filled with tutorials, tips, and examples. Search for specific techniques. Join online communities. Participate in discussions. This is a great way to learn and share your work. Consider joining social media groups. Follow the popular hashtags to discover new techniques and get inspired. Regularly visit these resources to stay updated with the latest trends. Sharing your work and getting feedback from others is a great way to improve your skills and enjoy your hobby.